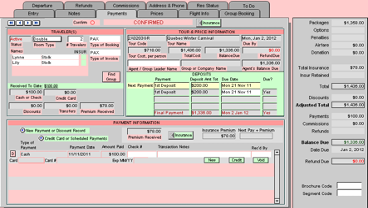
Detailed reservation records reflect packages and options purchased, payments due and received, and other data related to the booking.
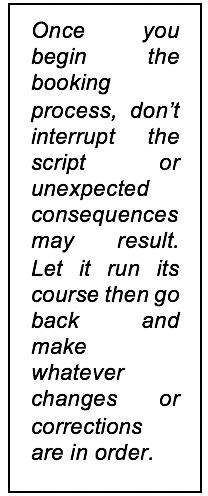
The booking process actually begins in the Client database, where your first order of business is to find (or create) the Client record to which this booking is to be linked. Note the record needs to be “Active” in order to proceed.
Making a Booking

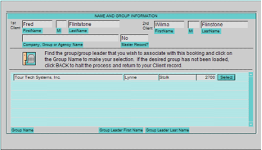
If you make a Booking and link it to a Master Record a couple of things are possible. First, you can generate a Confirmation or an Invoice either to the Client directly or to the entity referenced as the Master Record. Second, commissions can be calculated and subsequently paid. Finally, if you set up a Group Leader account, one invoice reflecting all charges for all associated travelers can eventually be generated. More detail on all of this will follow.
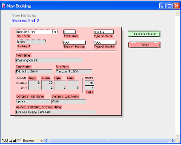
If you have selected the proper code, click on the green “Confirm Choice” button. If you’ve made an incorrect selection, simply select again. If you need to thwart the booking process because you’ve started from the wrong Client, or for any other reason, click on the “Oops” button.
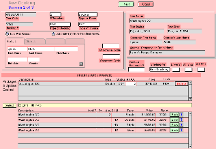
In the Brochure Code and Segment Code fields, select from the values that presents to identify how the booking came to be. The values you see are the same you used in Client.
If the reservation is for a Driver or someone (an escort or group leader) you consider to be Staff (traveling on a Single or Double occupancy basis), click in the appropriate field to load the number of passengers in the record to be tagged as such. (The numbers entered in these fields are what you see reflected in the fields of the same names in TM.)
Each time you make a booking, TourTools™ will automatically assign the next available Tag #. Tag numbers can be thought of as room numbers and are what allow you to tie reservations from separate records together on the rooming list. You will want to manually assign or override a tag number to travelers who have separate booking records but plan to share the same room.
Example
Harriet Smith and Betty Jones have two separate client records but are rooming together on a tour. Harriet’s reservation was processed first and was automatically assigned tag number 2. Two weeks later, you receive Betty’s reservation. Note Harriet’s number before processing Betty’s reservation, which will allow you to immediately enter “2” in the tag number field as you book Betty; or, once Betty’s reservation is complete, you can go back and override the number that was automatically assigned. The shared tag number is what will join them on the rooming list you will eventually generate.
The rooming list’s primary sort is on the Tag # so it is recommended that you assign a high number to the driver, tour escort, and group leader; that way, they will drop to the very bottom of the document.

As mentioned earlier, if there are other package types associated with the tour, additional buttons (labeled OPT, Land Only, etc.) will display. Click on them one by one and examine each list to make all the appropriate selections for your Booking. If you are not certain which Package is the one you want, clicking on the blue question mark next to the Book button, will take you to the Packages module, where you can view the itinerary to see what is included, before returning to the Booking.
To proceed to the next step in the booking script, click on the green “Next” button at the top of the screen.
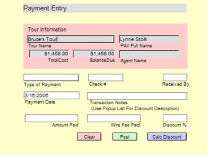
The “Type of Payment” is a value list of choices (Cash, Check, Credit Card, etc.), the check number goes in the field so labeled, the initials of the person posting the payment should be entered in the “Received By” field, today’s date will auto-fill in the “Payment Date” field, free-form notes can be entered in the “Transactions Notes” field, and the amount of the payment should be entered in the “Amount Paid” field.
If you want TourTools™ to calculate a discount based on a percentage of the total cost, select “Discount” as the Type of Payment and do not enter an amount. Rather, put the percentage amount as a decimal (example .10) in the “Discount %” field and click on the purple “Calc Discount” button. At that point the calculated amount will drop into the “Amount Paid” field.
When your record is complete, click on the green “Post” button to credit the payment or discount to the account. If payment was received by credit card, you will want to complete the card information on the Payment screen at this point.
Automated Credit Card Payments, Voids and Credits (Refunds)
To process a credit card payment online, click on the “Credit Card or Scheduled Payments” button.
Complete the Amount field (or click on the “Bal” button to load the current balance) and pick from the value list the “Payment Type” (1st deposit, Final Payment, etc.) as well as the “CC Transaction Type” (Sale, Credit or Void). If you have the security code, load it in the field labeled “ID”. This number is not vital to the process unless required by your credit card vendor.
When all entries are complete, click on the “Submit” button. Upon receipt of an authorization response, you will be prompted to post the payment to the account.
If you process a payment in error, click on the green “Void” button that appears beneath the entry on the “Payments” screen. That will queue up the details of the card, the amount, the authorization code related to the payment, etc. related to the payment that needs to be reversed. Follow the prompts to continue. Note: A payment can only be voided on the same day it was initially processed.
The process of posting a refund to a credit card is essentially the same. Even though the refund may not be related specifically to a payment previously posted (other than the card you are refunding is the same card used to process the payment), you nevertheless click on the green “Credit” button of an entry on the “Payments” screen, so long as the amount of the payment selected is greater than the refund to be processed. By example, if you have a record with payments of $150, $300 and $500 and need to post a refund for $250, you will want to click on the “Credit” button in either one of the last two payments (probably the most recent one makes the most sense). This is necessary because the credit card vendor needs to legitimatize the refund by tying it back to an actual payment by means of the “authorization code”.
In the new payment record that presents, the payment and credit card type of payment will be tagged as “Credit”. Change the amount of the transaction to reflect the amount you are refunding, and remove the credit card number (if it, in fact, autoloaded). If not all details of the cardholder have loaded, click on the Client button to bring that data over, before clicking on the “Submit” button to complete the process.
Pre-approved Credit Card Payments
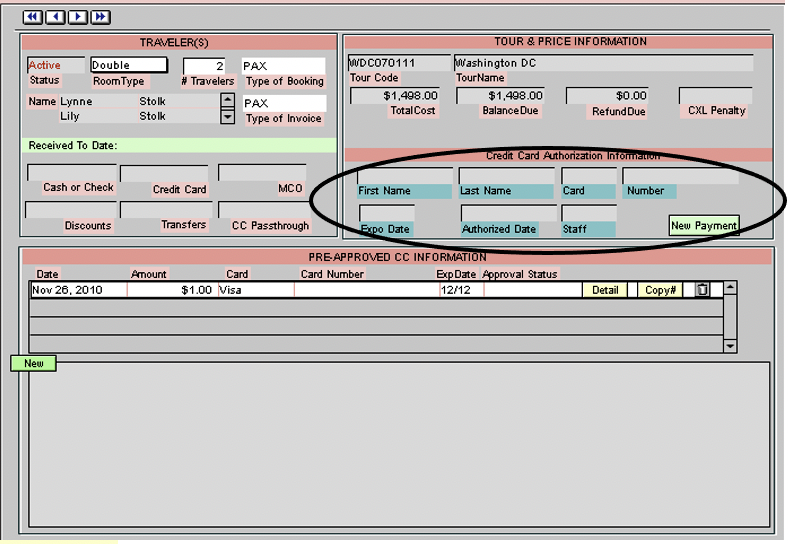
If you have been authorized to charge your client’s card an agreed-upon amount on a pre-specified date, create the payment record as normal but don’t submit it. As this type of record is created, it will be saved to the section labeled “Pre-Approved CC Information”. Use the “Copy” button in that section to copy the card number to your clipboard, and paste into the new records by either right-clicking or use CTRL V.
When you are ready to process them, click on “Detail” in the record to be posted. This will load the information back to the section below, at which point you continue the process as usual.
To see which payments have been set up in this manner, run the “Pending Transactions” report, by clicking on the button so named. You might also want to create “To Do” reminders for these pending payments.
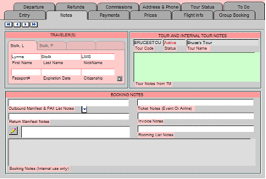
The reservation process ends at the Notes screen. Notes entered in the Outbound or Return Manifest fields will appear on the manifests that reflect who is joining and leaving the tour at points specified in the Tour Master record and picked in the Booking (further details follow). Invoice Notes will appear on the Invoice or Receipt, and Rooming List Notes are self evident. To make internal notes about the Booking, type in the unlabeled white field and click on the pencil to load. The remarks will be tagged with the current date as well as the user name associated with the FileMaker software.
Entry Screen
Most of the fields/buttons on this screen do not require explanation or have been addressed previously. Those that haven’t:
Wants a Roommate?: Choose the value “Wants Roommate” if, in fact, you’ve booked an individual who wants to share. On the List View layout in TM, you are able to reference tours on which you have singles looking for roommates.
Due By: Reflects the date, as loaded in the TM record, that the balance is due.
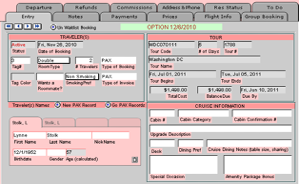
Cruise Information:
All of the fields that display under the “Cruise Information” heading are obvious as to manual input. If your system includes the “Cruise Module”, the Addendum to this manual explains in greater detail the fields that will automatically be filled in when cabins are assigned to the record.
Edit Medical/Dietary Info: For every name entered in the Booking record, there will be a corresponding “Pax” record. Those records are viewable by clicking on the “Edit Medical/Dietary Info” button. If passport details were loaded in the Client record when the Booking was made, those details will have downloaded to the Pax record. If those details are obtained later, you will want to update the Client record and then, on this screen, click on the “Update Passport Info from Client”. You can also update or edit the information right here; however, your input does not translate back to Client.
Payments Screen
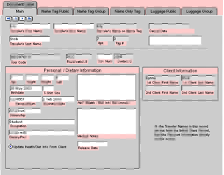
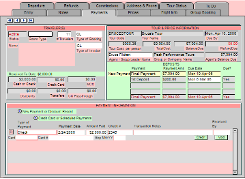
Type of Payment: “Credit Card Passthru” is one of the values that will be presented when you click in this field. Select this for instances where you pass your traveler’s credit card information on to another vendor—such as an airline or cruise line—in payment and they, rather than you, do the actual processing. Important: Don’t forget to make corresponding entries for payments processed in this manner to the Vendor account payable in Ops.
If you have situations where you need to transfer money from one account to another; use the “Transfer” payment identifier. In the booking record that you want to take the money from, enter a negative figure in the Amount field and reference the record to which you are transferring the money—perhaps by last name and booking number—in the “Transaction Notes” field. In the record you are transferring money to, you will again indicate “Transfer” as the type of payment but will enter a positive figure. In the notes field, again reference the name and booking number from where the payment originated.
Prices Screen
This screen shows the Packages and Options available and sold.
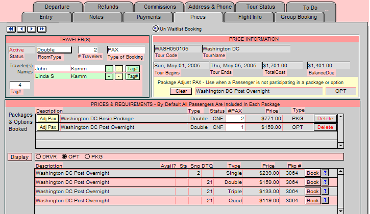
Use the “plus” and “minus” signs behind the travelers names in situations where not everyone in the record is doing the same thing. In this example, the “Adj Pax” button preceding the “Post Overnight” has been clicked, which loads that Package in the yellow area to the right. Linda’s name is highlighted in green to reflect that she’s the one confirmed for the Package. If the plus sign following John’s name were to be clicked at this point, he would also be confirmed for that Package and the #Pax confirmed would change to 2.
The fact that the post overnight is confirmed on a double occupancy basis indicates that Linda is going to share a room. To see who she’s tagged to or to assign a tag, click on the green “Tag#” button that follows her name.
Flight Info Screen
On the Flight Info screen, there are three tabs. From any one of the tabs, you can begin building your “flight library”.
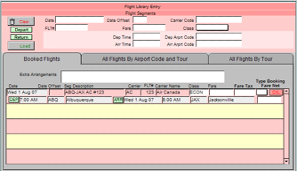
When it comes time to assign flight schedules to a specific booking record, click on the All Flights by Tour tab and make the selection appropriate for your traveler(s) by clicking on the “Book” button. That will load the itinerary to the Booked Flights tab.
If your flight list is quite lengthy, click on the second tab—All Flights by Airport Code and Tour—to assemble just the flights from a particular airport. By example, if you want to view and select from just the Albuquerque departures, you would select ABQ from the drop down list in the Departure Airport Code field and only the Albuquerque-departing flights would queue for you to select from. Again, make your selection by clicking on the “Book” button.

If you have a schedule that is similar to one that is already in the library, click on the “Edit” button and in the window that opens use the “Duplicate” button to make a copy of the itinerary. Then, open the new record—again using the “Edit” button—and make whatever changes are necessary before saving.
Group Booking Screen
The “Make Another Booking…” button is what you will click to begin the process of making a group booking. These steps are explained in detail later in the chapter.
Group/Agency or Company Information: If the Booking was made via a GL record, the Group Leader’s Client record will be referenced on this screen. Clicking on the button labeled “Find Group” will assemble all of the Bookings for the same tour related to the same Group Leader.
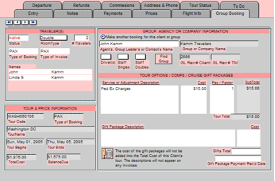
Gift Package Description. Use this area to load the cost for gifts that are purchased by a second party for the passenger. By example, the children of some cruise participants want to surprise their parents with a fruit basket in their cabin. You can load the description and the cost detail, and log the date you received payment. None of this information affects the balance due, does not appear on any invoice or confirmation, and does not impact your P/L.
Departure Screen
Refund Screen
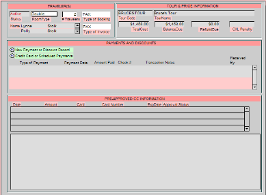
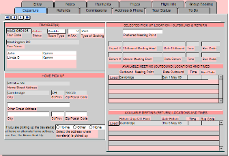
If a refund is payable due to an overpayment or due to cancellation of a reservation, come to this screen to see the detail and to close the account unless the refund is to be made to a credit card (for those specifics, see Page 24). Using the cancelled reservation scenario (a booking can be cancelled simply by clicking on the “Cancel” button at the top of the screen), the display might look something like what you see here. In the View Payment area you can see what’s been received ($200), and the penalty as set in the Tour Master record ($100) displays in the “Cancellation Penalty” field. Clicking on the “Enter Refund” button will load the refund payable and at that point the “Refund Due” will zero out. Posting the refund in the lower section of the screen is exactly like posting a payment (unless you are issuing the check from the system; see Writing Checks in the Ops chapter).
Note: It is possible to override the penalty that calculates automatically from Tour Master. In this case, if you decided to penalize the travelers just $25, you would overtype the $100 “Cancellation Penalty” with that amount and the “Refund Due” would adjust to $175.
The “Refund Letter” found on the Reports menu will display all of these figures on a document that can be mailed, along with your check, to the passenger.
Refunds due to overpayment are handled in the same manner from this screen. All refunds pending in your system can be viewed on the “Refunds Due List”, another report that can be accessed on the Reports menu.
Commission Screen
Two variables need to be in place for commission to calculate in a Booking record. First, the price of the Package(s) booked must allow for a commission (the Package chapter explains this in detail). Second, the Client record to which the Booking record is linked must be a “Master” and needs to have a “Commission Rate” loaded (on the Business/School screen).
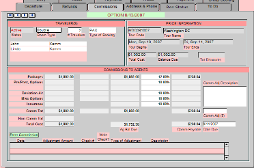
You can see that any Packages identified as “2nd level” would be commissioned at 10%, as would any air, options, etc. (in our example there were none).
You can manually manipulate the commission figure if need be. In this example, if you wanted to round the commission to an even $239, in the Comm Adj field, enter a negative .04. If you wanted to round upward to $240, your entry would be .96.
You can also override the percentage(s) if appropriate. If the commission level on the base Package needs to be reduced from 12% to 11%, simply overtype the figure to make the adjustment.
The “Comm Adj Description” field is for free-form entry of an explanation for whatever adjustment is made.
TourTools™ queues the commissions to be paid on the return date of the trip. You can override the calculated date by changing it in the “Date Due” field. The “Commission Due List” report will give you an overview of these payables.
When you are ready to pay the commission, click on the “Enter Commission” button. The date and the amount of the check will drop into the appropriate fields, and the “Type of Adjustment” will automatically be tagged as “Commission Retained” if there is still a balance outstanding on the account. If the account has been paid in full, the type will be identified as “Commission”. To complete the transaction, enter the check number (unless you are issuing the check from the system; see Writing Checks in the Ops chapter).
Address & Phone Screen
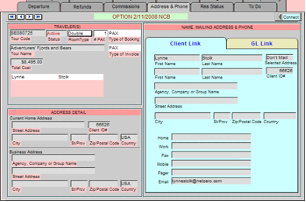
This screen references the address and contact details loaded in the Client record from which the booking originated. If that record was the traveler, the “Client Link” tab would be populated. If the Client was a “Master” record—a reseller (Group Leader or Agent)—then the “GL Link” will show the detail.
Res Status Screen
Click on this tab for an overview of what’s been purchased, payments that have been made, and the status of insurance charges and premiums.
To Do Screen
The Bookings database is one of many from where you can create “To Do” records. For specifics, see Chapter 9.
Making a Group Leader Booking
The “Making a Booking” section that appeared at the beginning of the chapter covered making a reservation for an individual who is booking direct and paying their own expenses. In situations where you have a sponsoring organization or a group leader acting as an intermediary, you will set up a Group Leader booking record. GL records can be used in situations where you never actually receive the names of the travelers— perhaps for a day trip—and it will suffice to simply invoice for “x” number of travelers; or, when you receive nothing more than the names of the travelers, in which case there’s no need to create a Client record, but a summary invoice is still desired.
The process of creating the Group Leader record begins exactly the same as for an individual, i.e., start in the Client record—*_which must be identified as a Master_*—and click on the (new) Booking button. Once in the new Booking record, select the tour code and skip over or select “nothing” in the “#Travelers” and “Type of Room” fields. Select “GL” as the “Type of Booking” and “Type of Invoice” and “Confirm Choice”. No name is entered in the record.

This process can be repeated for as many packages as you have available and wish to sell or set up for invoicing. By example, if on this tour we needed to also invoice for 9 persons in a triple and 12 in a quad, we would repeat the process of selling twice more. When you finish, the Prices tab will reflect the sale of 4 Doubles, 9 Triples, etc., and the “Group Leader Invoice”, that can be run from the Reports menu, will detail these charges.
If, as promotion of the trip moves along, there are changes in the numbers of passengers expected to travel, you will return to the Prices screen and click on the number currently confirmed for a given Package. The same window as above will open, and you will adjust the number now expected to travel on that basis.
If the record created in the early stages was to allow creation of a pro-forma invoice and you now have actual names of the travelers, come to the Prices screen, and delete the number of Package(s) sold. You will then create Booking records for the named travelers by following the process described next.
When there is no need to create an invoice reflecting numbers without names, create a GL record Booking just as before, but move past the Prices tab without selling any Packages. Instead, complete the Booking and return to the Group Booking tab. Click on the “Make Another Booking for This Client or Group” button.
The screen that you see next is a compilation of the main Entry screen and the Prices layout. You’ll note that the #Travelers and Type of Room will default to 2 and Double which can be overridden; in fact as you enter names, the number will change automatically (change the room type manually as necessary).
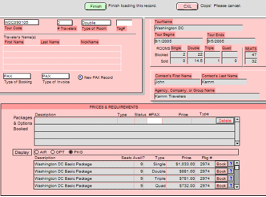
The screen that appears next prompts you to make another booking in the same manner or stop. Once you have entered all of your group names, click on “Done”.
The individual Booking records thus created will reflect Package sales on the Prices tab, but appear to have no corresponding balance due. What is happening is, the cumulative total of all charges for all bookings are being swept to the GL/GL holding record. This includes the cost of all Packages plus any “Options” sold on the Group Booking tab or any flight segments sold on the Flight Info screen in the individual records.
Some things to remember about Group Leader holding accounts:
If the group leader is actually traveling, it is recommended that the first Booking you make from the GL holding account be theirs. Remember that the holding account—the GL/GL record— is just that; it is not a reservation record for any individual.
Unless your group is being billed outright for a tour manager and driver, reservations for those personnel will be made direct, in other words, not via the GL holding account.
All financial transactions+—including the posting of income and the payment of refunds or commissions—+must be made in the GL holding account. Nothing of this nature should be posted to the individual booking records. Even if checks are received directly from a traveler to pay for an individual service—an airline ticket or some optional expense, by example—the payment still gets posted to the GL record. In such a case, the “Transaction Notes” field would ideally reference the payee.
As a reminder…If you generated a pro-forma invoice and then receive actual names from your group leader, remember to go to the Prices tab in the GL record and delete the preliminary sales you made before entering the names as actual sales. This will prevent the reservations being waitlisted due to lack of space because of a “double booking”.
Canceling an Entire Booking Record or One Individual Traveler

In a scenario where one of several individuals in a Booking record needs to be removed—by example, Mr. Flintstone needs to cancel his reservation but his wife still plans to travel, you would—first of all, on the main Entry tab—delete Fred by clicking on the trashcan button behind his name. The “# Travelers” will change from 2 to 1 and the Double (room type) will change to Single. On the Prices screen, the number of the packages presently booked will have likewise changed; however, the _type_-single, double, etc.—may need to be swapped out. Do this by clicking on the “delete” button corresponding to the package that needs to be cancelled, and then select the proper package from below, as was done when the Booking was initially made.

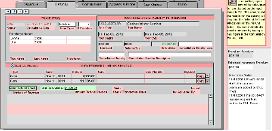
Insurance
The sale of insurance coverage can be automated in TourTools™. The specifics of what you sell and how you sell it will need to be set up, but in general, here is how it all works.
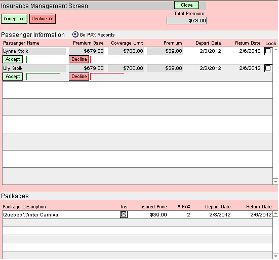
If the passengers are purchasing coverage, you will click on the green “Accept” button beneath their name, which will load today’s date in the field adjacent and essentially finalize purchase (to set the field for all passengers at once, use the “Accept All” button) and add the premium to the cost of the trip.
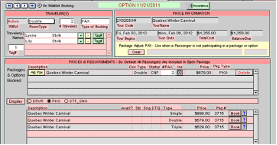
If the passengers do not want to purchase coverage, it’s your choice to simply not check the insurance box on the Prices tab. If you want or need to keep record that coverage was offered but was declined, then check the box and on the insurance layout click the red button labeled “Declined”. Today’s date will load to the adjacent field to reflect the travelers having “opted out” of coverage.
Reports Menu
In the opening chapter, mention is made of how important it is to be aware of when you are accessing all records as opposed to being within a “Found Set” of some sort. This is particularly important when running reports in Bookings. These reports are scripted to assemble records and compile lists including all active reservations sharing the tour code of the record you are currently on. Be aware that it is possible to use the same layouts but assemble your own set of records outside of the script parameters (to do so requires that your password allows access to layout mode, or the layout needs to be accessible from Browse mode).
Example
You have a tour being co-promoted by two group leaders and you want to run a rooming list showing passengers for just one of them. Go to the Group Booking Screen and—in find mode (not using the “Find” button at the top of your screen) perform a find on the GL Rec # Client (your group leader’s Client number) and on the tour code. Your found set will be the reservations for this specific group leader on this specific tour. Next, move to the layout called “Rooming List” from the layout menu (just above the flip book) and do a sort on the records (for the rooming list, based on the Tag#) . Preview the report by going to preview mode and print it from the FileMaker menu. To return to the booking record click back to the “Entry Screen” layout.
Since there are so many reports and documents available in the Bookings database, they are divided over four different tabs, as follows:
Doc Queue Tab
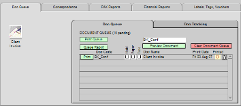
A single click on the icon will send the document in question to the document queue. If you wish, all documents queued up can be run at the same time by clicking on the “Print Queue” button (any marked “Hold” will not print). Or, if preferred, single documents can be run by clicking on the “Print” button.
If the Client record to which the Booking is linked has an e-mail address, the document can be e-mailed or it can be printed to paper instead; you will be given the choice when you click on the “Print” button. If you are going to run the documents from the queue, be sure to click in the box labeled “Paper” for any registrants who have e-mail but don’t want to receive their documents that way, because the process is automated, in other words the e-mail/paper choice will not be presented for each individual record.
As soon as the document is sent, the button labeled “Printed” will be selected. If there is a need to re-print, “de-select” the button by clicking on it.
For any documents that need to be tracked—in other words, they need to be returned to you by the traveler—click the “Trak” field. Once the form is returned, record the date on which that happened in the “Recvd Date” field on the Doc Tracking tab.
The other buttons on this layout include the “Queue Report” which will generate a report showing everything that is in the queue; and the “Clear Document Queue” button which will clear the queue completely of any documents that have yet to be printed. Use the “Preview Document” button to preview any document in the Booking’s queue.
Correspondence Tab
Group Leader Invoice: This is the invoice you will send to your group leaders. The individual travelers linked to the group leader are listed on the form, as are all charges and payments that have been swept to the GL account. If you prefer to send a summary of charges without all of the detail, run the GL Summary Invoice from the Doc Queue tab.

Unstored Fax/Unstored Letter: Use as a means to send a quick note or fax to the traveler. As the name implies, these are not permanently stored anywhere in the system; each time the form is used, you overwrite the text that was entered the last time.
Pax Reports Tab:

Passport Report: This report displays the passport information, birth date and occupation information loaded in Client.
Departure Bus Manifest: Use this report to see “who’s getting on where”, based on input made on the Departure screen. The $$ appearing to the left of the passenger name indicates that the traveler still owes you money.
Return Bus Manifest: This report is identical to the outbound manifest only showing the return day information.
Air Manifests: When you call this report, you are given the option of displaying data by “Pax” or by “Segment”. If you chose “Pax”, each individual traveler and their schedule will list; and if you pick “Segment”, all travelers on a specific schedule will display as a group.
Ops Report: This is a “hot key” to the reports menu in Ops.
Waitlist Report: When this report is called, you are given the choice of listing passengers waitlisted on all tours or just the tour that shares the code of the record you’re in.
Cruise Dining List: This report displays the dining preference and dining notes loaded on the main entry screen in the Booking record. Dietary preferences loaded in the Client record are also referenced.
Cruise Special Occasion Report: This report reflects information entered in the Special Occasion and Amenity Package Bonus fields, also on the main entry screen.
Financial ReportsTab:
Cash Report: This report can be run by a specific date, date range or tour; and shows all payment activity. Even though it is called “cash” report, all forms of payment are displayed.

Credit Card Report: This report is identical to the “Cash Report” as far as how it is called and what it displays; however, it displays only payments identified as “Credit Card”.
Refunds Due List: This report lists the Bookings that are due refunds, either as a result of an overpayment or because the reservation has been cancelled.
Commission Due List: Commissions are considered payable upon departure of a tour. This report can be called by tour, all tours, or commissions due in the next 30 days. The presentation/sort is by tour.
Tour Element Inventory Report: Use this report (also available from Package) to determine why a Booking has waitlisted. Each element of the Package sold will be reflected on the report, along with an accounting of inventory loaded, sold and still available.
Booking Status Report: This report lists passengers by tour, showing an overview of the finances of each Booking—total charges, total and type of payments made, commissions due/paid—plus cumulative totals.
Salesperson Totals: If the Client record to which the Booking is linked had a Salesperson loaded at the time the reservation was processed, the Booking references this person. The Salesperson Totals report can be called by tour or by a range of tours, and presents the salesperson’s production in terms of passenger numbers and revenue.
Booking Totals: This is essentially a listing of passengers by tour or range of tours, showing the Client record to which they are linked, specifics on all payments posted to the account, and the balance due. Cumulative totals appear at the bottom.
Tour Totals w/o Financial Info: This report is a simple list of tours, shown in departure date order, reflecting the number of current active, waitlisted and cancelled bookings.

Labels, Tags and Vouchers Tab:
Avery Labels/Envelope: You can print one of two varieties of labels or #10 envelopes from Bookings. Once having clicked on the icon of choice, you will be asked if you want labels for everyone on the tour or if you want to select specific records.
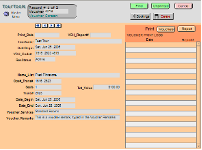
Name Tag/Luggage Tag: Clicking on this button will move you to the PAX records related to the tour referenced by the record you’re in. From here, select which type of tag or label you wish to run by clicking on the appropriate icon.
If you have any questions that are not answered here Contact TourTools Support for assistance.


Post your comment on this topic.