
Optimize Your Communications Workflow with the Email & Task Automation Module
 TourTools users can have welcome emails, payment reminders, late payment notices, post-tour emails, etc. sent out automatically, every night, from their TourTools application. Email messages are sent based on criteria that you specify. The blocking tool allows you to exempt certain tours and bookings from the process, making the feature highly flexible. Internal task creation can also be automated with this feature.
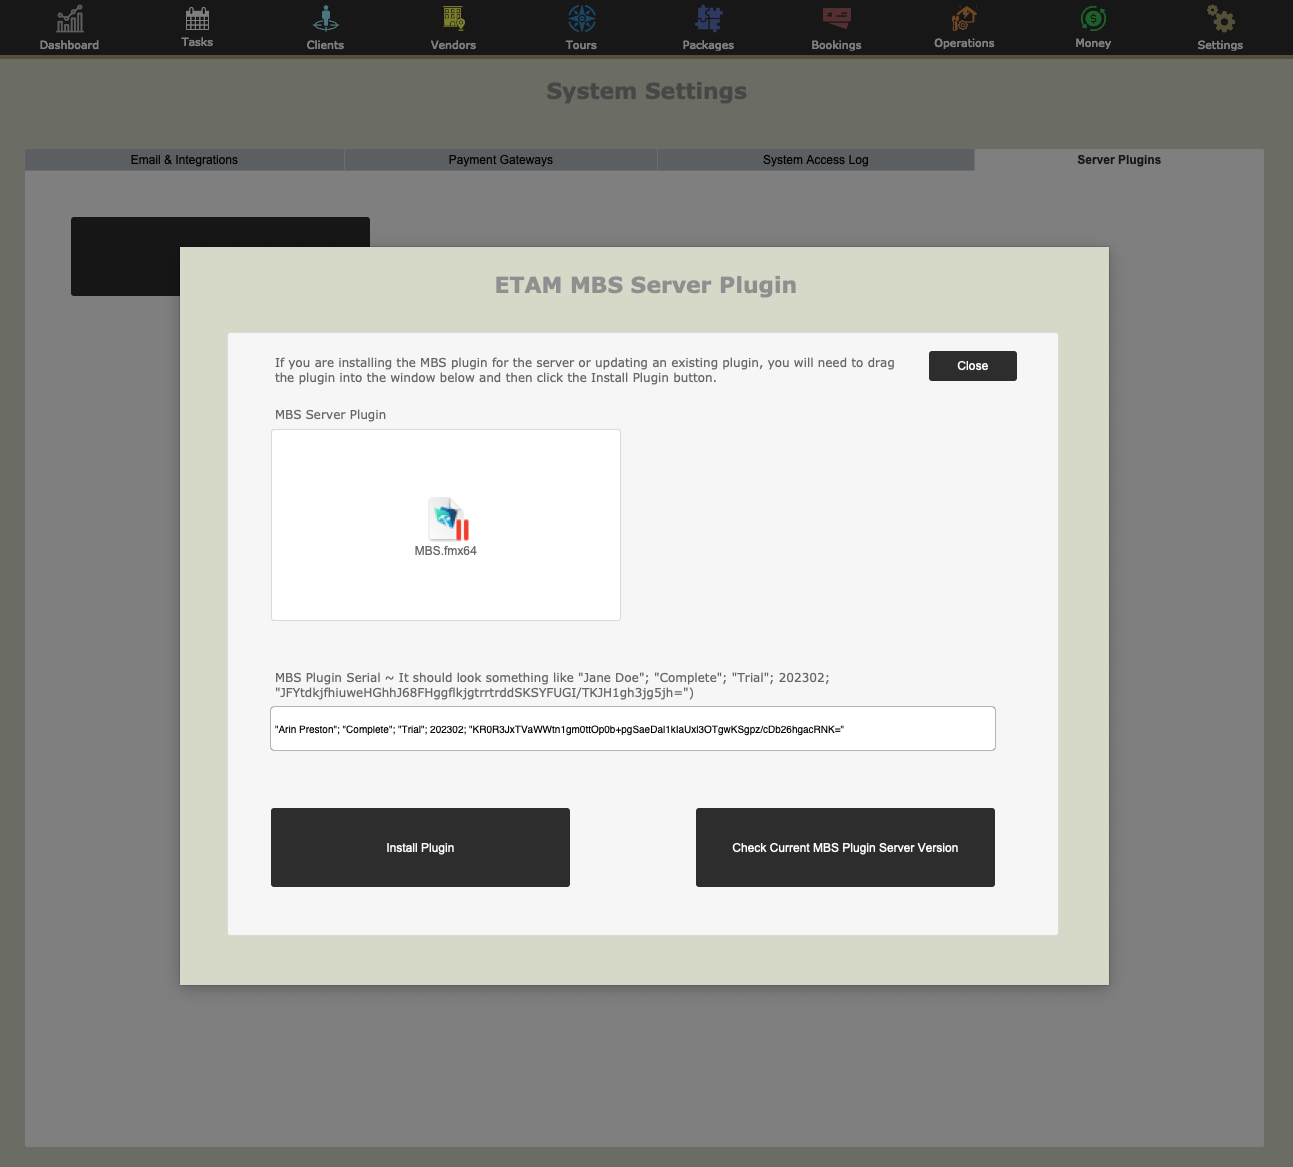
This feature does require the purchase and install of the MBS Plugin. Once purchased, drag and drop the plugin into this window and TourTools will install it on startup automatically.
Feature Summary
The email and task automation system utilizes ‘modules’ to process data within the database automatically. An example of this would be to automatically send an email, tailored to each passenger traveling on any Bookings which will be departing within 3 weeks.
The term ‘modules’ can refer to emails or tasks that are processed automatically on a specific date. The information pertaining to the email or task is held within a Module record, however, although Modules can be considered to be global (eg a Module can be referenced from any Tour) there needs to be method to store Tour specific information – such information is stored in a Checklist record. You can compare a Module to an uncompleted questionnaire whereas a Checklist would be the answers to the questionnaire (without the questions) – on their own, they are of little use but when combined, they serve a purpose.
Module Recap: an email module will hold general terms but isn’t specific to a particular Tour eg “120 days before a Tour departs, a specific email needs to be sent to all travelers on a Tour.” Thus a Module will store the fact that an email needs to be sent 120 days before the Tour departs but since it’s not specific to a Tour, it doesn’t store when that is because different Tours may have different depart dates.
Checklist Recap: a checklist is linked to a specific Tour and a specific Module, so the checklist links a Module to a Tour so we can tell exactly when a specific Module needs to be processed for a specific Tour.
Administration
Module records can be accessed in the Business Settings layout > Email & Task Automation tab.
A nightly schedule runs and generates emails as required. if any email Modules are sent out, a report is created showing the results of the. The report is sent to the address set in the Email Report Address field.
If you need to test the ETAM system you can add an email address to the Email Test Address field and emails will be sent there instead of to the Account Manager, Host or Traveler email address.
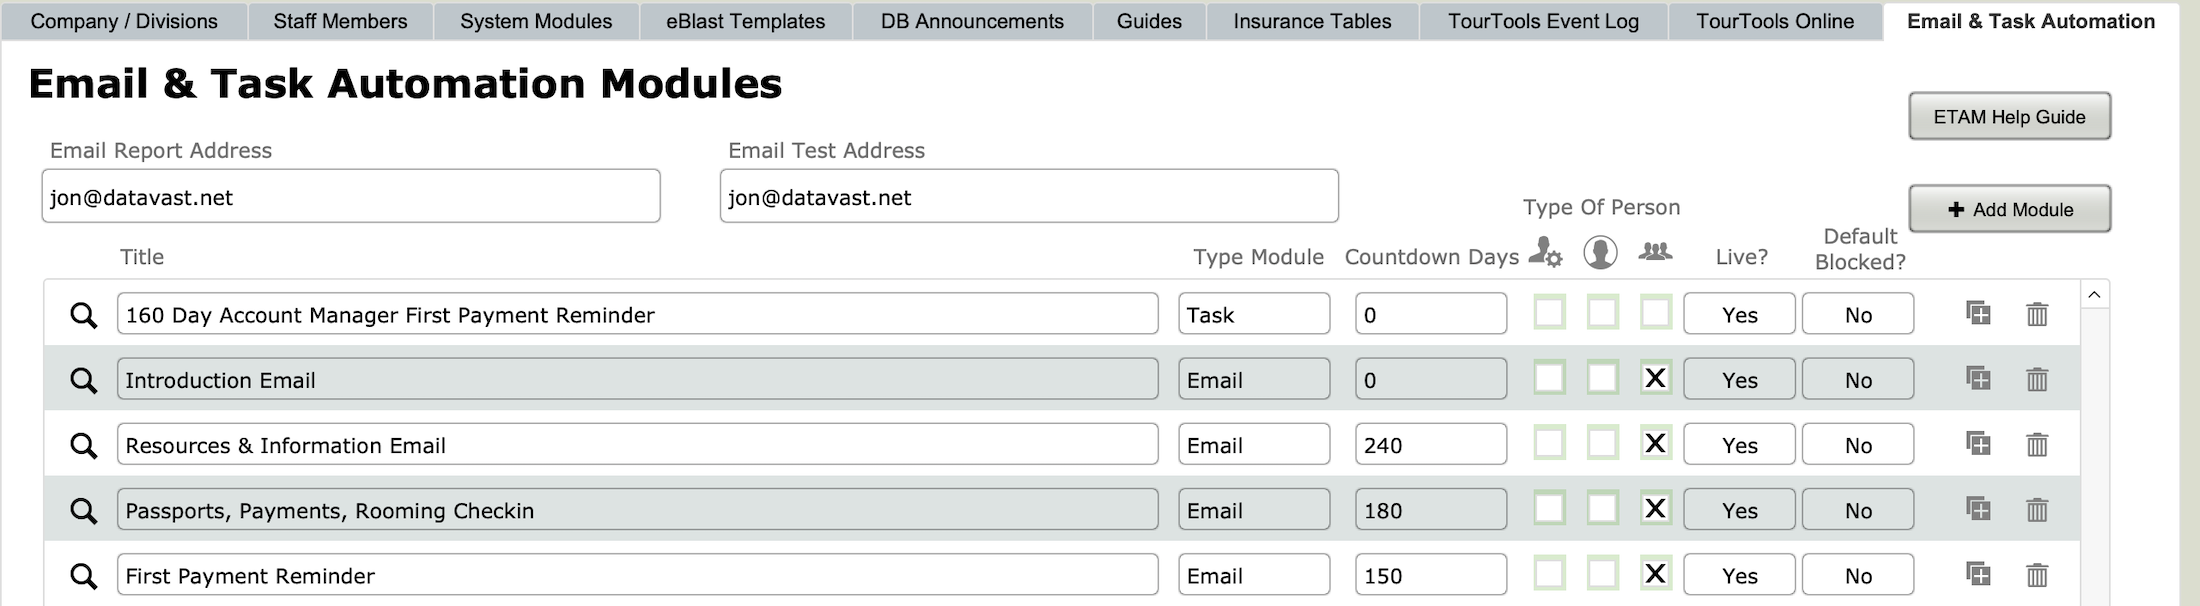
Each Module record is displayed in a portal and can be shown in detail via a card window (shown below) which is Module type specific (ie there is one layout for email Modules and another for task Modules). The Module card windows allow the user to adjust all aspects of the module.
In the case of email Module records, the user can:
1. See what the non-HTML and HTML body of the mail will look like.
2. Insert mail merge tags for the record data required in the email.
3. Include email attachments.
4. determine when the email delivered.
5. Set who the email is delivered to.
General settings are shown below and highlighted in red.
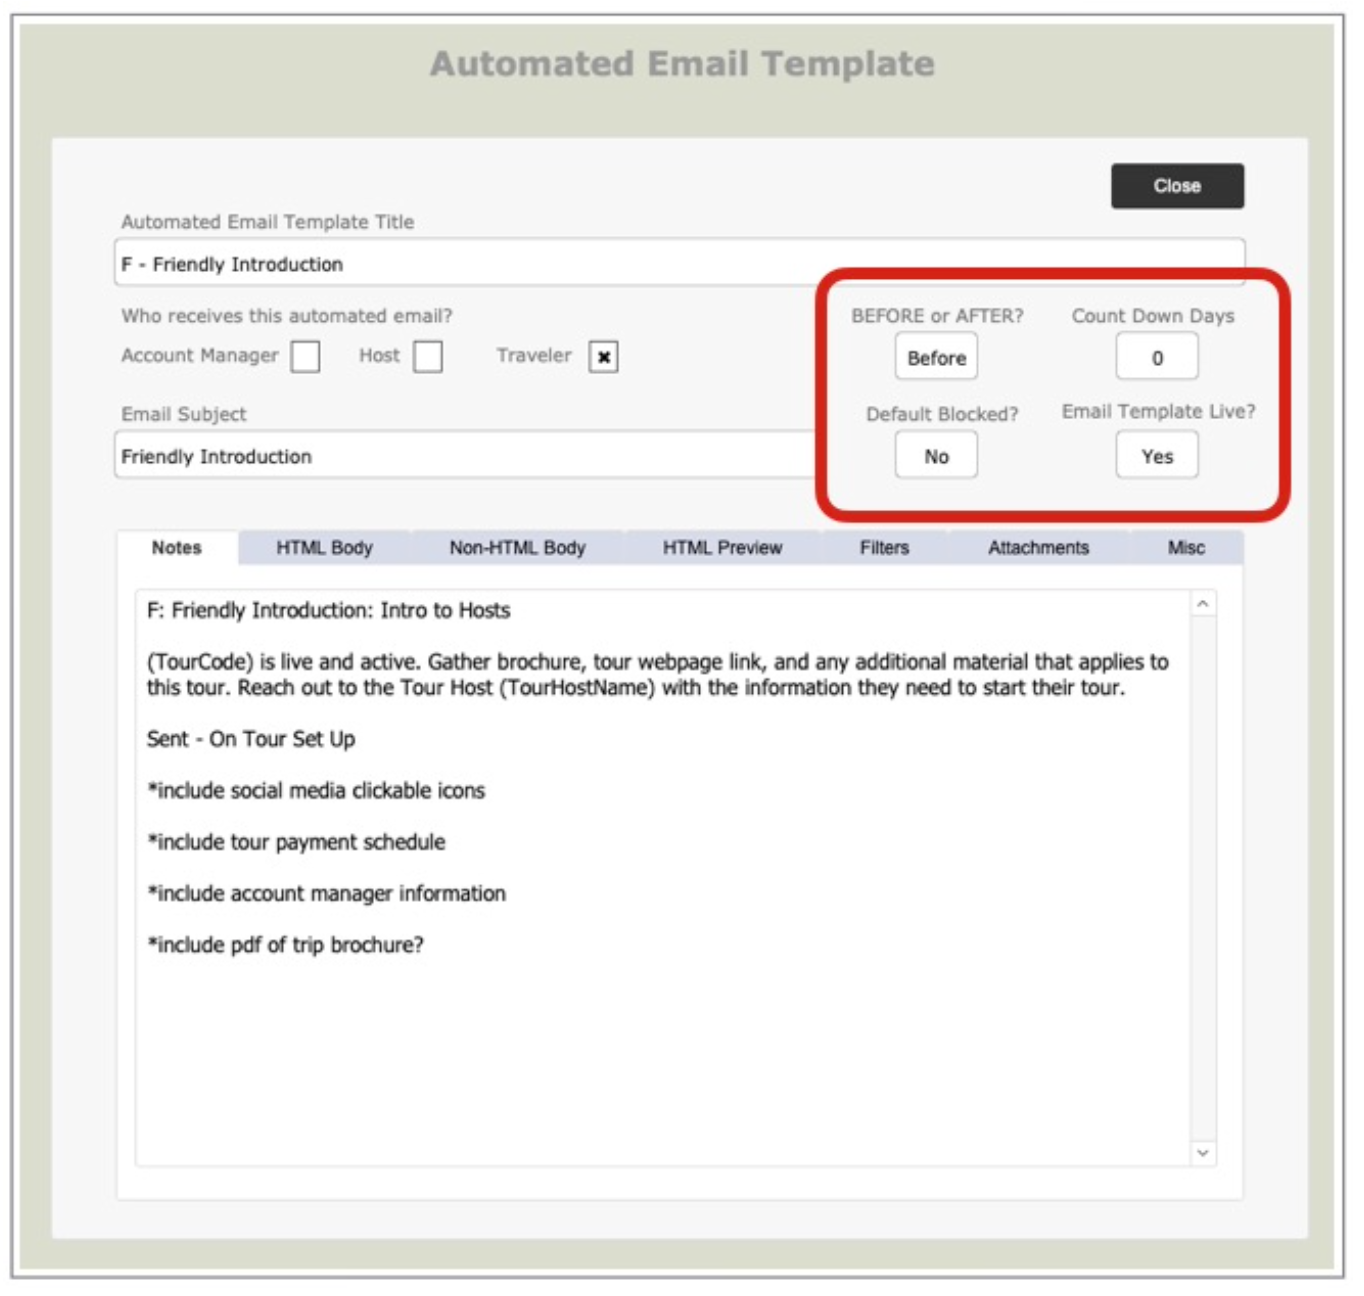
BEFORE or AFTER
Determines when the email will be sent – BEFORE the Tour takes place or AFTER it returns.
Count Down Days
Refers to how many days the email will be sent either BEFORE the Tour departs or AFTER it returns.
Default Blocked?
When a Module is added to a Tour, will it be blocked initially (ie won’t send for that Tour) or not. This is a handy feature as it will allow the user to create a test Module, add it to Tours but block it as a default (so it doesn’t get sent). Then the user can set it to unblocked for just the chosen tours. It can also be used in cases where a Module might only be used to certain types of Tour so needs handling manually.
Email Template Live?
If a Module isn’t live then when a Tour becomes active, it will not be added to the list of Modules for that Tour. This is handy as it allows the user to create a Module but not have it processed until they are ready (eg for Modules which are in the process of being edited).
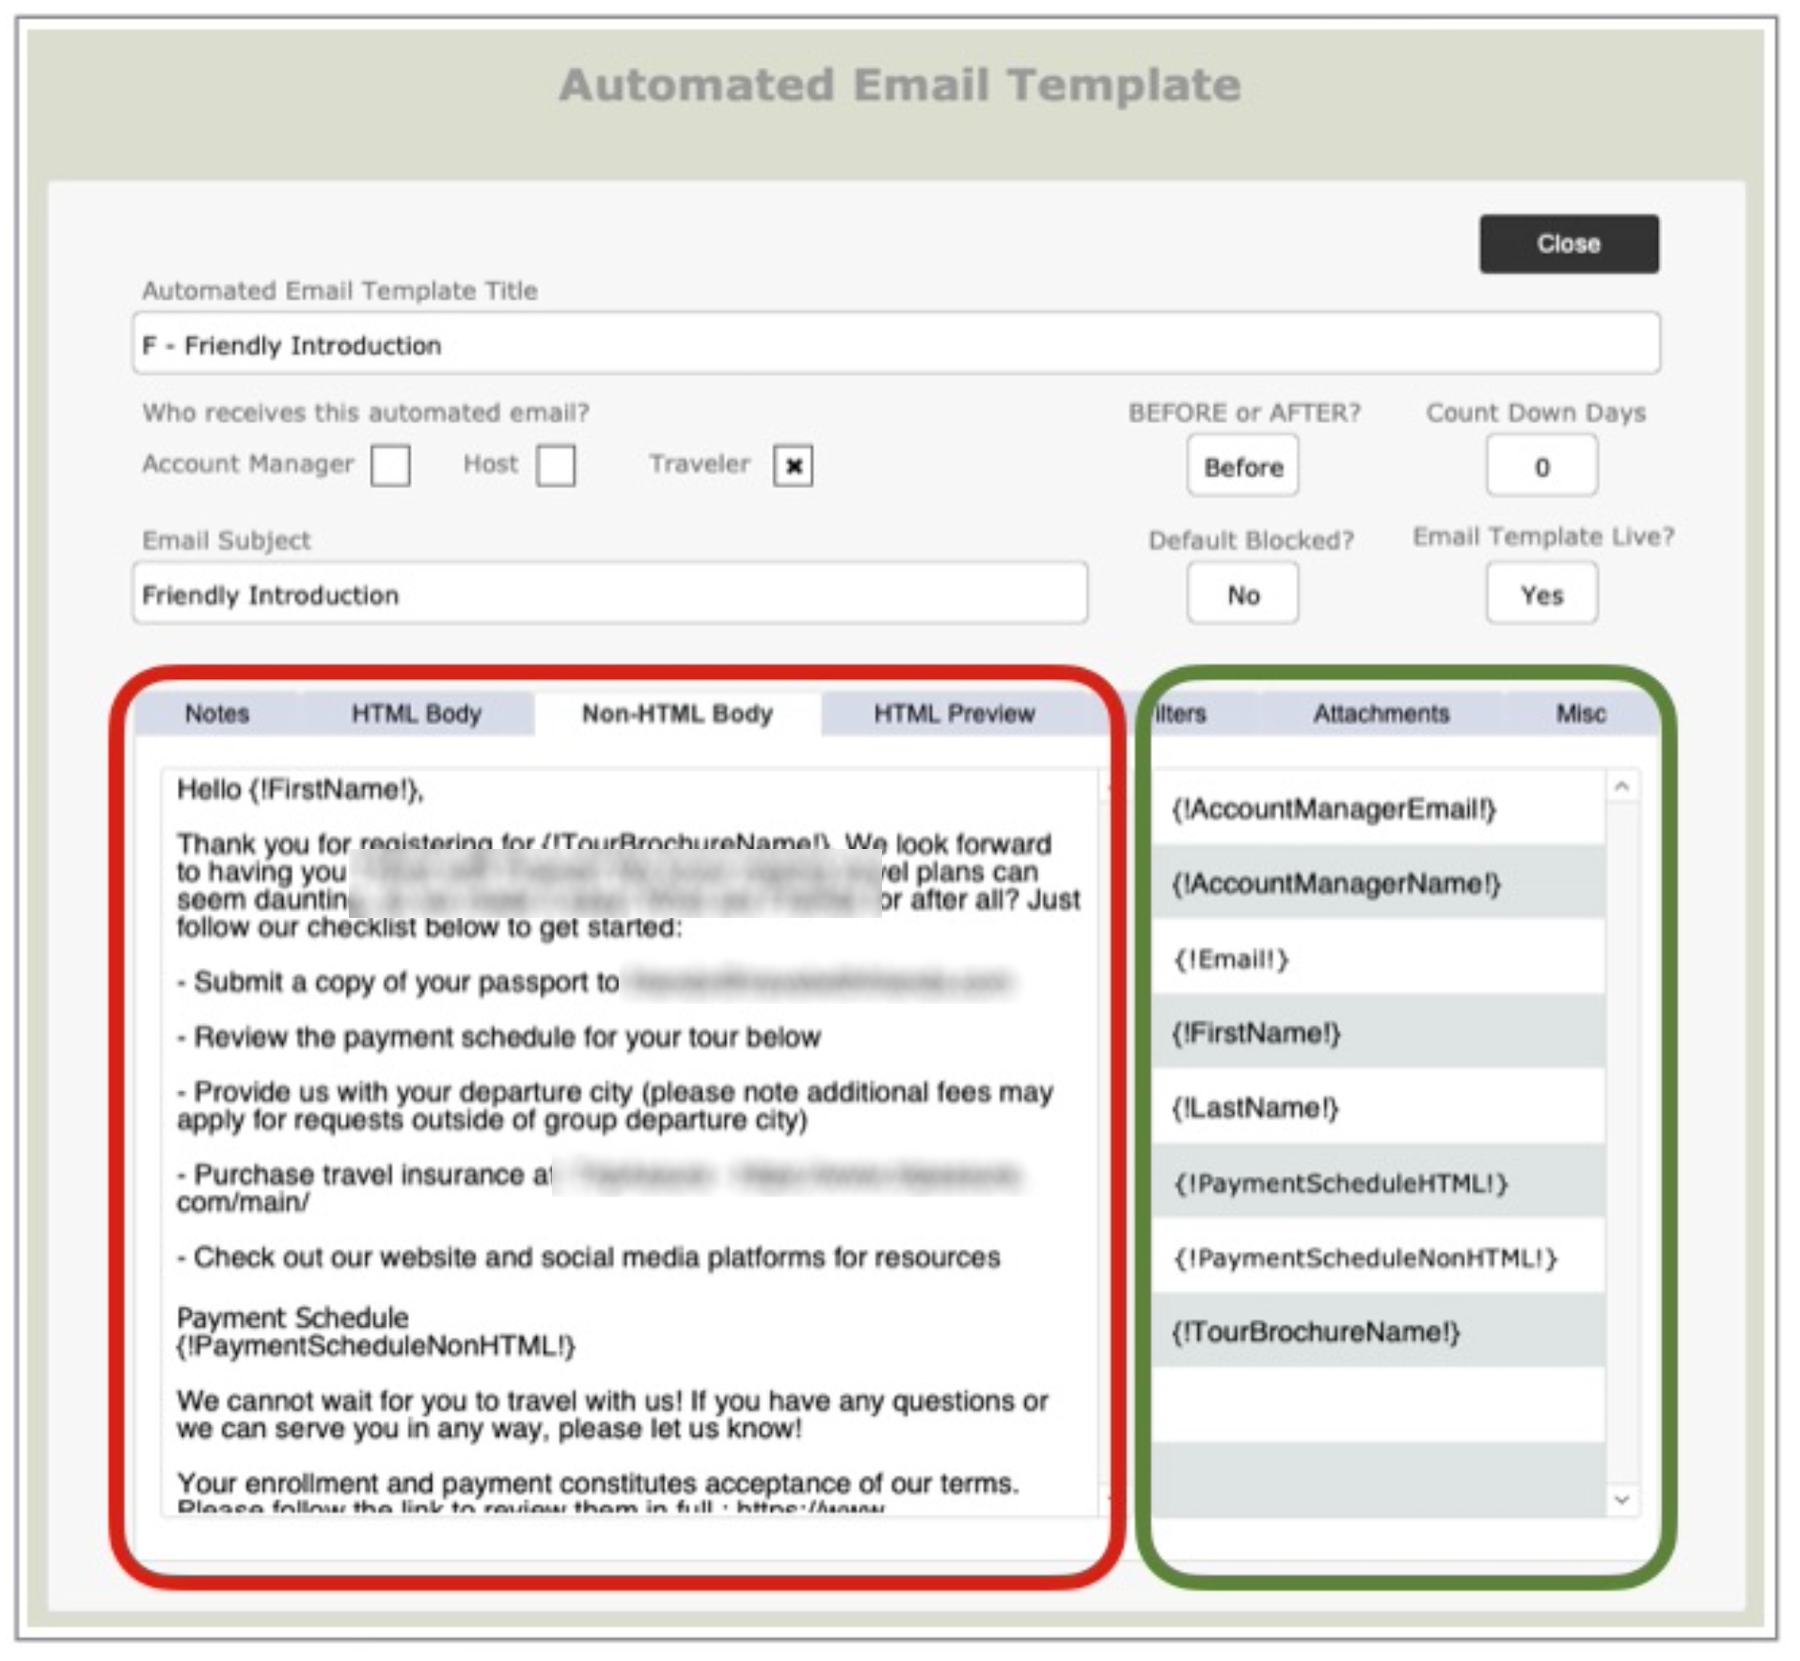
To add a mail merge tag to an email, go to the HTML Body or NON-HTML body tab. Place the cursor into the text where you want it to appear (highlighted below in red), then select from the list by clicking onto the mail merge tag (highlighted below in green).
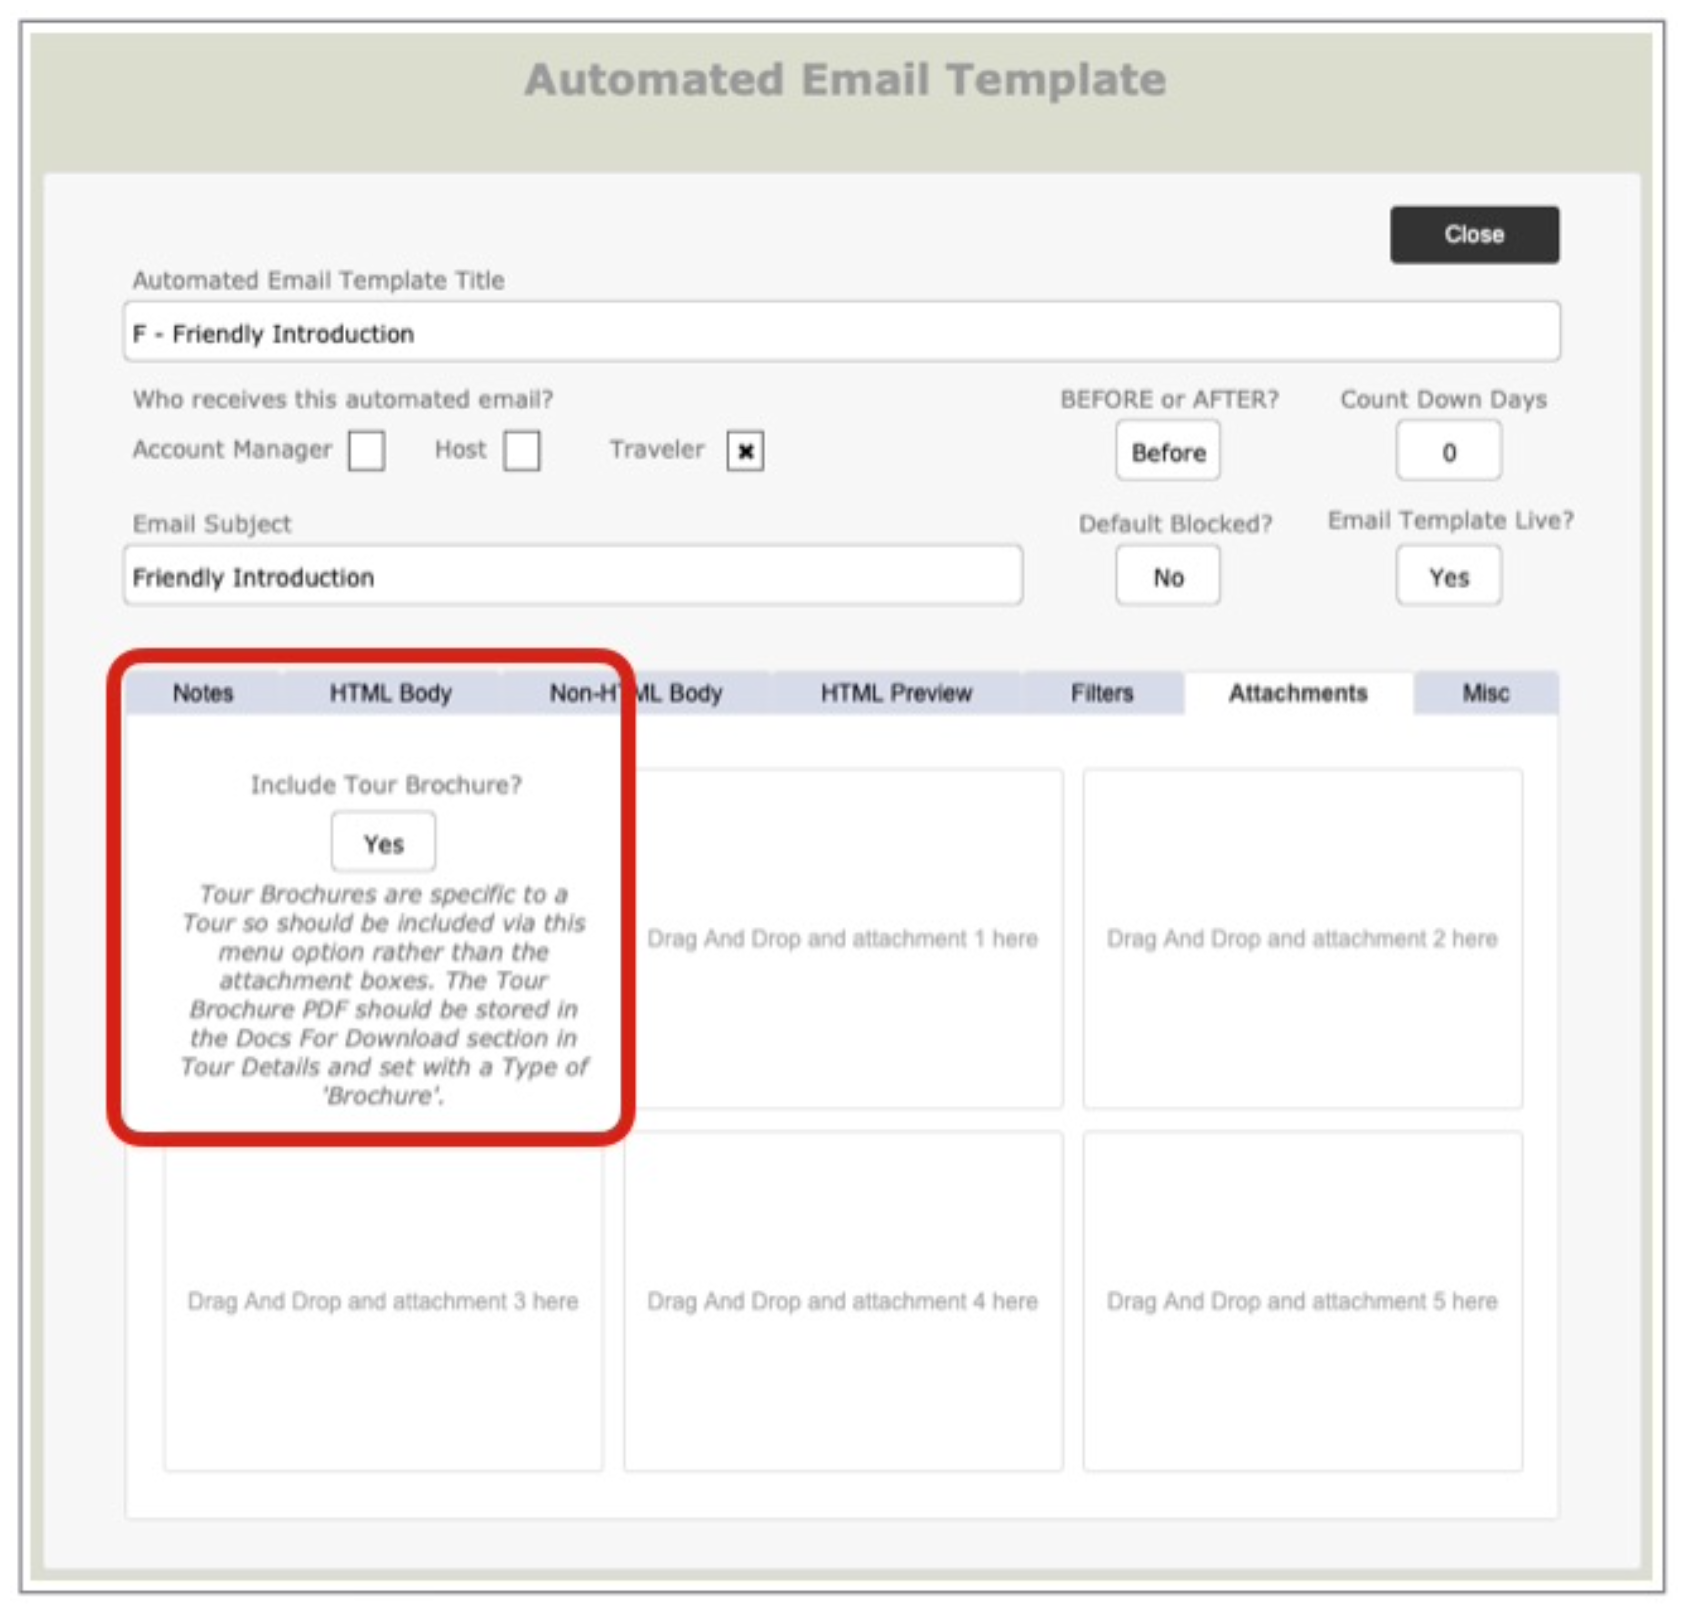
Some email Modules will require attachments. You can drag and drop an attachment into one of the attachment boxes (shown below). These attachments cannot be Tour specific as you will be selecting a single attachment for (potentially) all Tours.
In the case of Trip Brochures, which are Tour specific, you will need to select YES for the “Include Tour Brochure field” (shown below in red). Since Tour Brochures ARE specific to a Tour, you will need to ensure that the Brochure has been added to each Tour that requires one. You can add the brochure from the Tour Detail page via either the Web Publishing > Docs for Download tab or the TourTools Online > Docs for Download tab.
Testing
To test a Module, it is recommended that you create a test Tour and populate it with Bookings and Passengers with a known email address. From the Tour detail layout, you can then use the manual method of sending out a single email Module (by clicking the icon at the end of a row).
For additional protection, you can set the Email Test Address field (shown below in red) in the Business Settings > Email & Task Automation tab to a chosen address and all emails (except for the email report) will go there instead.

Tour Modules
The portal showing the Modules specific to a Tour (shown below) can be accessed in the Tour Detail layout > Tasks / Docs tab > Email & Task Automation tab. From here you can see how many days are left before the email will be automatically generated, who the email is going to (notice the Account manager, Host and Traveller check boxes). You can also tell if the Module is Blocked or not.
If the “?” icon appears on a row, it indicates that the Tour Brochure is expected to be used for that Module but one has not been added to the Tour. If this is the case, you will need to add the brochure via either the Web Publishing > Docs for Download tab or the TourTools Online > Docs for Download tab (please ensure that the document TYPE is set to BROCHURE otherwise it will not be included in the email).
Things you can do:
1. You can manually change the date that the email will be sent out by clicking in the date field for the chosen email.
2. Recreate the email Module for the Tour (in case you want to reset it to its original value) by clicking the gear/settings icon.
3. You can manually send an email Module out by clicking the envelope icon.
4. If the message “Default settings missing – please click here to define them” appears, you will need to click the message and the missing Checklist data will be created.

Booking Modules
The portal showing the Modules specific to a Booking (shown below) can be accessed in the Booking Detail layout > Tasks / Docs tab > Email & Task Automation tab. From here you can see whether a Module is blocked at the Tour level (Tour Block? column) or for this current Booking (Block Emails? column).
To explain this further, if you want to block an email Module for an entire Tour, you would head to the Tour Module portal (described in the Tour Module tab of this help guide) and set “Blocked?” to YES. Alternatively, if you only want to block an email Module for certain Bookings within a Tour, you would set the “Block Emails?” column to YES.

If you have any questions that are not answered here Contact TourTools Support for assistance.
Post your comment on this topic.